












Write latency on a logical volume doubles or worse with no obvious cause. The disks are healthy, dmesg shows no I/O errors, no RAID resync is running, and the workload has not changed. The one thing that did change: someone created a snapshot, often hours or days ago, usually for a backup that has long since finished.
This is a traditional (thick) LVM snapshot working as designed. While the snapshot exists, the first write to every chunk of the origin triggers a copy-on-write (COW) cycle: read the original chunk, write it to the snapshot’s exception store, then write the new data. One application write becomes a minimum of three physical I/Os. Under write-heavy load, origin latency doubles or worse, and it degrades further as the exception store fills.
The tell is the timeline: latency spikes the moment a snapshot appears and recovers the instant it is removed or invalidates. If latency steps up at snapshot creation and steps back down at removal, you have your answer.
What this means
A traditional LVM snapshot is not a copy. It is a small pre-allocated exception store plus a rule in the kernel’s device-mapper layer: “before you overwrite any chunk of the origin for the first time since I was created, save the old chunk to me first.” That is what lets the snapshot present a point-in-time view of the origin. The cost is paid by the origin, not the snapshot:
- First write to a chunk: read old data, write old data to the exception store, write new data. Three I/Os instead of one.
- Repeat writes to an already-copied chunk: no COW, normal write path. The penalty concentrates on first-touch writes; reads on the origin are largely unaffected.
- Every additional snapshot on the same origin adds its own COW copy. Each first-touch write triggers COW on all snapshots, so stacked snapshots compound the overhead.
- The exception store receives scattered writes. If it sits on the same PV as the origin (the default), snapshot and origin traffic compete for the same disk.
Only LVs with active snapshots are affected. If one LV is slow and its neighbors on the same disks are fine, that asymmetry is itself a strong hint.
Thin snapshots are a different mechanism: they share the thin pool and have no fixed per-snapshot exception store, so they do not impose this specific COW penalty. Their failure mode is pool exhaustion, which freezes every thin LV in the pool at once. That is covered in LVM thin pool out of data space. For the full layering picture, see How LVM actually works in production.
flowchart LR
  A["App write to origin LV"] --> B{"Active thick snapshot?"}
  B -->|"no"| C["Write new data: 1 IO"]
  B -->|"yes, first write to this chunk"| D["Read old chunk"]
  D --> E["Write old chunk to exception store"]
  E --> F["Write new data"]
  F --> G["Total: 3 IOs minimum"]
  B -->|"yes, chunk already copied"| C
  H["Each extra snapshot on the origin"] -. "adds one more COW copy" .-> E
Common causes
| Cause | What it looks like | First thing to check |
|---|---|---|
| Backup snapshot left behind after the backup finished | snap_percent creeping up for days, latency elevated the whole time | lvs -o lv_name,origin,snap_percent,lv_time against backup job logs |
| Multiple snapshots on one origin | Latency far worse than 2x, stepping up with each snapshot added | Count snapshots per origin in lvs output |
| High-churn origin with an undersized exception store | snap_percent climbing fast, latency worsening as it fills | snap_percent sampled twice, minutes apart |
| Exception store on the same PV as the origin | One PV saturated while sibling PVs are idle | lvs -o lv_name,seg_pe_ranges plus per-disk utilization |
| Unexpected write burst on the origin (deploy, batch job, reindex) | snap_percent jumps, latency spike starts with the burst | Application write throughput versus its baseline |
Quick checks
All of these are read-only and safe to run during an incident.
# 1. List all snapshots, their origins, and how full they are
lvs -o lv_name,vg_name,origin,snap_percent,lv_attr -S 'seg_type=snapshot'
Any LV listed here is an active thick snapshot. Empty output means no thick snapshots exist and this article does not apply.
# 2. Check for already-invalidated snapshots
# An invalid snapshot shows 'I' (uppercase) in its lv_attr state field
# (position 5, per lvs(8)).
lvs -o lv_name,lv_attr -S 'seg_type=snapshot' --noheadings
An invalid snapshot has already lost its data; the kernel skips invalid snapshots, so origin overhead disappears when it invalidates. An invalid snapshot plus a latency graph that already recovered means the performance incident is over but the restore point is gone.
# 3. Map LV names to dm devices
dmsetup ls
# 4. Measure write latency on the origin's dm device (two samples, 10s apart)
grep ' dm-' /proc/diskstats > /tmp/dm.a
sleep 10
grep ' dm-' /proc/diskstats > /tmp/dm.b
awk 'NR==FNR {w[$3]=$8; m[$3]=$11; next}
     ($3 in w) && ($8 > w[$3]) {
       printf "%-14s writes=%6d  avg_write_ms=%.2f\n", $3, $8-w[$3], ($11-m[$3])/($8-w[$3])
     }' /tmp/dm.a /tmp/dm.b
/proc/diskstats fields are cumulative counters, so you need a delta between samples: average write latency is milliseconds-spent-writing divided by writes completed. If sysstat is installed, iostat -x 10 2 on the dm device gives the same answer with less awk.
# 5. Check queueing on the origin right now (ios_in_progress)
awk '$3 ~ /^dm-/ {print $3, "inflight="$12}' /proc/diskstats
Sustained inflight counts well above baseline mean writes are queueing behind the COW cycle.
# 6. Find which PVs hold the snapshot's exception store
lvs -o lv_name,vg_name,seg_pe_ranges -S 'seg_type=snapshot'
If those ranges sit on the same PV as the origin, COW traffic is hammering the same disk the application is writing to.
# 7. Look for invalidation events in the kernel log
dmesg | grep -i 'invalidating snapshot'
“Invalidating snapshot: Unable to allocate exception” means the exception store hit 100% and the snapshot is dead.
# 8. Infer the amplification factor: PV write volume versus origin write volume
iostat -x 10 2
Device-mapper exposes no direct amplification metric; you infer it by comparing I/O at the origin dm device against the underlying PV. A PV doing roughly 3x the origin’s write throughput while a snapshot is active is the mechanism showing up in numbers.
One caveat: lvs and friends take LVM metadata locks and can hang on a badly stuck system. If they do, fall back to dmsetup status, which reads from kernel memory.
How to diagnose it
- Establish the symptom. From check 4, write latency on the origin’s dm device is 2x or more above its normal baseline, sustained for minutes. The penalty lands on writes; reads stay close to normal.
- List the snapshots on that origin (check 1). Exactly one LV with
originpointing at your slow LV is the common case. - Correlate the timeline. Compare the snapshot’s creation time with the moment latency stepped up. This correlation is the distinguishing feature of the failure. If latency started before the snapshot existed, keep looking: check thin pool usage (
lvs -o lv_name,data_percent,metadata_percent), mirror resync progress (copy_percent), and dmesg for device errors. - Check for compounding. More than one snapshot on the origin, or an exception store sharing a PV with the origin, makes the same mechanism worse.
- Check the snap_percent trajectory. Fast growth means the snapshot is also racing toward invalidation, which is a second incident (a lost restore point) stacked on the performance one.
- Confirm by removal, if operations allow it. Removing the snapshot is both the fix and the proof: origin latency returns to baseline immediately.
Metrics and signals to monitor
| Signal | Why it matters | Warning sign |
|---|---|---|
| snap_percent per snapshot | Countdown to invalidation; growth rate reflects origin churn | Above 70% and rising; jumps of several percent between samples are normal because allocation happens in chunks |
| Origin dm write latency | The user-facing symptom | 2x or more over baseline, sustained longer than 5 minutes |
| Snapshot count and age per origin | Each extra snapshot adds a COW copy; old snapshots are usually forgotten ones | More than one snapshot per origin; any snapshot older than 24 hours on a high-churn LV |
| Inflight I/O on the origin dm device | Shows queueing from serialized COW work | Sustained elevation versus baseline |
| Utilization of the PV holding the exception store | Same-disk contention between COW writes and origin writes | One PV near saturation while siblings are idle |
| Kernel invalidation messages | The snapshot died; latency recovers but the restore point is gone | “Invalidating snapshot” in dmesg |
Fixes
If the backup is done: remove the snapshot
# WARNING: irreversible. The point-in-time view is gone.
lvremove <vg>/<snapshot>
This is the definitive fix. Origin latency returns to baseline immediately and the exception store’s space is freed at once. Two checks first: confirm the backup that used the snapshot actually completed and is restorable, and confirm nothing is still reading the snapshot (a mounted snapshot, an in-flight copy job).
If the snapshot must live longer: extend it
# Grow the exception store to avoid invalidation
lvextend -L +<size>G <vg>/<snapshot>
This buys protection against overflow and nothing more. It does not reduce COW overhead; latency stays elevated for as long as the snapshot exists. Use it when a backup is still running and the snapshot is trending toward 100%. Requires free extents in the VG.
If the snapshot exists for rollback: merge it
# WARNING: destructive. The origin reverts to the snapshot's point-in-time state.
# All data written to the origin since the snapshot was taken is lost.
lvconvert --merge <vg>/<snapshot>
Merging restores the origin to the snapshot’s point-in-time state and eliminates the COW overhead once the merge completes. It discards everything written to the origin since the snapshot was taken, and it requires the snapshot to still be valid. Only choose this when rollback was the intent all along.
If several snapshots are stacked on the origin
Remove all but the one you actually need. There is no way to make stacked thick snapshots cheap: every first write pays the COW penalty once per snapshot. If your backup tooling creates a new snapshot without deleting the previous one, fix the tooling.
Recreate with better placement and chunk size
If you snapshot write-heavy origins regularly:
- Place the exception store on a different PV than the origin at creation time (pass the target PV as a positional argument to
lvcreate) so COW traffic does not fight the origin for the same disk. - Create with a larger chunk size (
lvcreate -s -c). The default is small, 4 KiB on many distributions, which produces many small COW operations under random write loads. Larger chunks mean fewer, bigger copies; the tradeoff is that each first-touch write copies more data if the application writes in small blocks. Chunk size is fixed at creation, so changing it means removing and recreating the snapshot.
Long-term: move snapshot-heavy workloads to thin provisioning
Thin snapshots share the pool and carry no fixed exception store, so they avoid this origin-side COW penalty and the cliff-edge invalidation. The risk moves to the pool: a full thin pool freezes every thin LV in it, so pool data and metadata monitoring become the critical signals instead. Migration means recreating the volumes, so plan it as maintenance, not as an incident fix.
Prevention
- Treat snapshots as short-lived objects: create at backup start, remove at backup end, and alert on anything older than 24 hours on a busy origin.
- Alert on snap_percent at 80% and treat 95% as urgent. Overflow is instant and irreversible.
- Keep one snapshot per origin. Make stacking a deliberate, documented exception.
- Size the exception store at least 2x the total write volume expected during the snapshot’s lifetime.
- Keep COW traffic off the origin’s PV where the layout allows it.
- Baseline per-LV write latency so a 2x step-change is an alert rather than a user complaint. Alert on deviation from baseline, not absolute thresholds.
- If snapshots are part of the daily workflow, evaluate thin provisioning and monitor the pool instead.
How Netdata helps
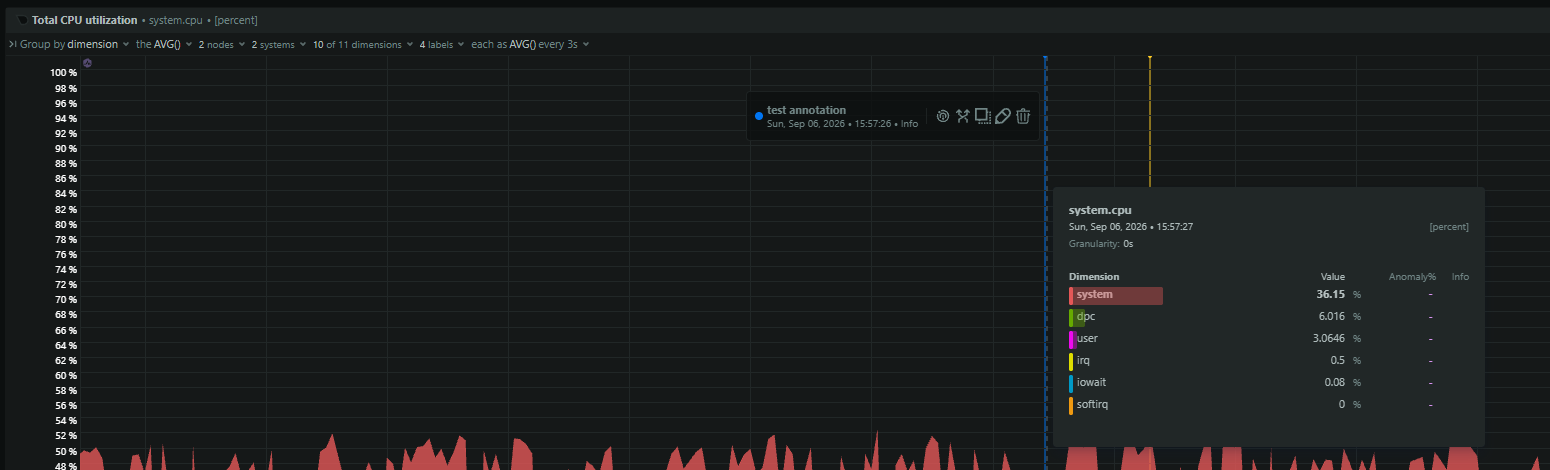
- Netdata charts per-dm-device write latency and throughput from /proc/diskstats at per-second resolution, computing the deltas for you. The step-change at snapshot creation and the instant recovery at removal both show up on the same graph.
- Overlaying the origin LV’s write throughput against the underlying PV’s makes the roughly 3x amplification visible, which is as close as you can get to a COW metric since device-mapper does not expose one.
- Per-PV disk utilization surfaces the same-disk contention case without manual iostat work.
- Snapshot usage and age alerting catches snap_percent climbing toward invalidation while you are focused on the latency incident, so the restore point is not silently lost in the background.
- Retained history lets you line the latency step up against change records (snapshot cron entries, backup jobs) during the postmortem. LVM itself keeps no history; without time-series data this correlation is guesswork.
Related guides
- LVM cannot extend a logical volume: adding a PV when the VG is full
- LVM filesystem full while the volume group has space: the resize step everyone forgets
- How LVM actually works in production: a mental model for operators
- LVM Insufficient free extents: the volume group is out of space
- LVM monitoring checklist: the signals every production volume manager needs
- LVM monitoring maturity model: from survival to expert
- LVM reached low water mark for data device: the thin pool warning before the freeze
- LVM thin pool space not reclaimed: discard, TRIM, and fstrim
- LVM thin pool auto-extend not working: threshold 100 means disabled
- LVM thin pool out of data space: every thin volume freezes at once
- LVM thin pool metadata full: the exhaustion that can corrupt the pool
- LVM thin pool check needed: thin_check and lvconvert –repair